How To Organize Your Loose Recipes + A Delicious Summer Recipe

Last Sunday I spent some time organizing all my loose recipes. I thought it would just get my life organized, but really it got me really excited about cooking more and helped me find some old recipes that have been tucked away. Since I posted this on twitter & facebook, I’ve gotten several requests about how I organized it! Well, I’m sharing the entire easy process with you…
Here’s What You Need
3-ring binder: The key is to use a D-ring binder for easy page turning. I like white because color can actually have a psychological affect on your appetite! Well, hey, if you’re on a diet you may want to use a binder in the color blue to tame your appetite!
sheet protectors: All my recipes go into sheet protectors so I can pull it out, cook, then wipe it down and put it back in my book.
adhesive tabs: the adhesive tabs are important because when you use standard sheet dividers, the tabs will get lost behind all you recipes in sheet protectors. You simply add these to a sheet protector and it’s an instant page divider.

Here’s How I Organized It
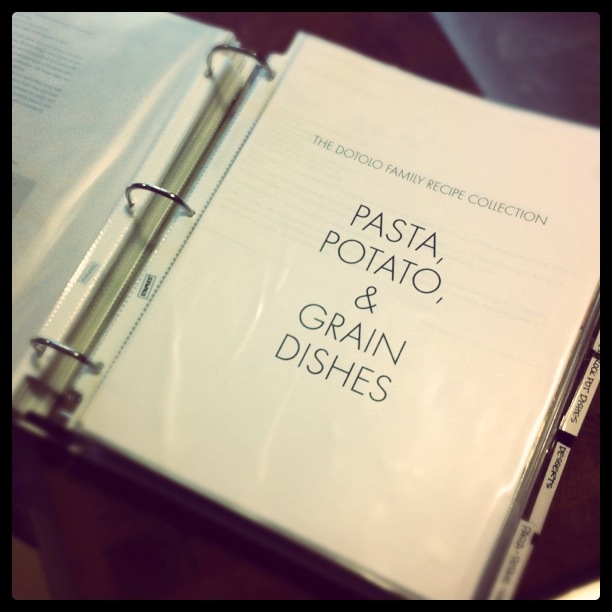
As, you can see above, I also printed sheet inserts for each tab divider. I organized my recipe collection into tabs that worked for my family. You can do yours however it works for you! Here are my tabs:
Breakfast & Brunch Appetizers & Bites Soup, Salad, & Sandwiches Sides Pasta, Potato, & Grain Dishes Meat Dishes Fish & Seafood Dishes Crockpot Dishes Desserts Cocktails & BeveragesYou may want to add a tab for Vegetable Dishes if you eat a lot of main dishes that are vegetable, but these are typically Sides for us. So, I decided not to use that tab.

Tips For Organizing Your Loose Recipes
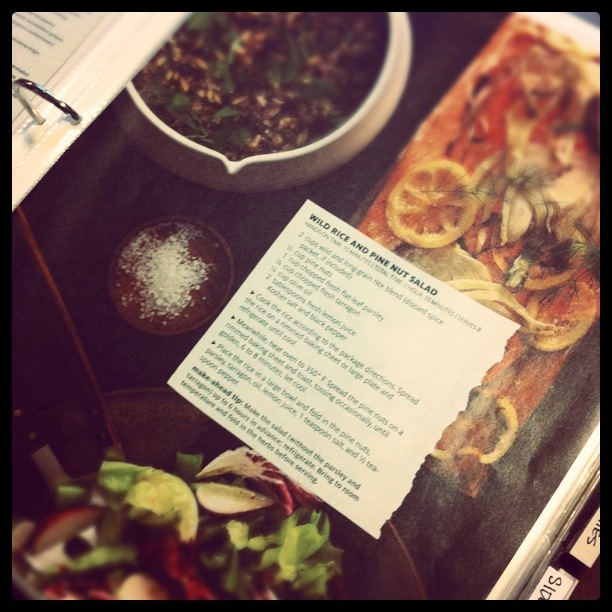
Use images whenever possible! I find that when I don’t have an image with my recipe it’s not nearly as appetizing. Usually when you’re tearing from magazines, the picture is on a different page than the recipe. Simply cut it out and tape it together. (see above)
Try to keep your recipe pages as clean as possible. When you tear magazine pages there may be other things on the page that don’t include food. Cut your recipe out and paste it on a white piece of paper and insert into your sheet protector. Do the same for the small recipe cards that friends and family give you. I just hate those little floating recipe cards!
Keep it all on one page. The key here is to be able to take a sheet protector out to cook and not do any flipping. If it’s a recipe that was printed from a website or it was from a magazine and it’s on two pages, just chop it up and tape it to a blank sheet of paper to contain it on one page. I promise, it will be way more organized and much easier to cook this way!
Use the back and front of a sheet protector. I have one recipe on one side and a completely unrelated recipe in that same category on the back. I like this because you don’t have to worry about organization within the tabs. You will constantly be adding to each tab & you don’t want to have to re-adjust everything when you add a recipe. Plus, those pesky sheet protectors aren’t cheap!

Did you see that rice salad recipe in my book above?? Well, here it is! I made it this week and it was delicious! A perfect summer recipe. Refreshing & filling! This will be in our permanent collection, for sure! Here’s the recipe…
Wild Rice & Pine Nut Salad
from Real Simple Magazine
Ingredients
- 2 cups wild and long-grain rice blend (discard spice packet, if included)
- 1/2 cup pine nuts
- 1 cup chopped fresh flat-leaf parsley
- 1/4 cup chopped fresh tarragon
- 1/4 cup olive oil
- 2 tablespoons fresh lemon juice
- kosher salt and black pepper
Directions
- Cook the rice according to the package directions. Spread the rice on a rimmed baking sheet or large plate and refrigerate until cool.
- Meanwhile, heat oven to 350° F. Spread the pine nuts on a rimmed baking sheet and toast, tossing occasionally, until golden, 6 to 8 minutes; let cool.
- Place the rice in a large bowl and fold in the pine nuts, parsley, tarragon, oil, lemon juice, 1 teaspoon salt, and ½ teaspoon pepper.
The whole process is really simple and, for me, quite cathartic. If you take on this project (or this rice salad) shoot me a tweet at @hellosplendor! I’d love to see how yours turned out & re-tweet it to everyone!
How do you organize your recipes?
Credits

SECTIONS
Design InsiderEntertaining + Home Living
Health + Beauty
News + Announcements
Pulp At Home
Pulp Design Work
Shopping Guide
The Business of Design
The Pulp Edit
Travel
Videos
GET INSPIRED
SUBSCRIBE TO OUR NEWSLETTER TO
GET AN INSIDER LOOK IN YOUR INBOX


